| ♥ 0 |
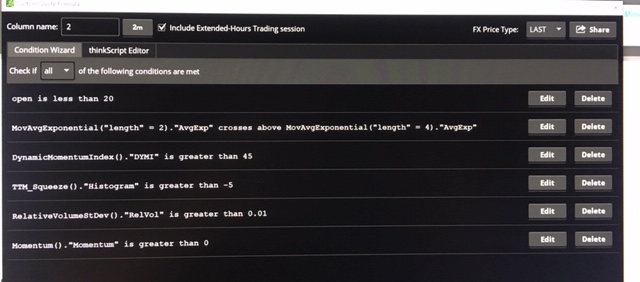
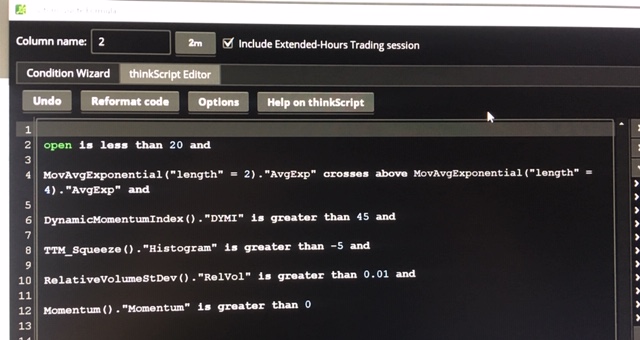
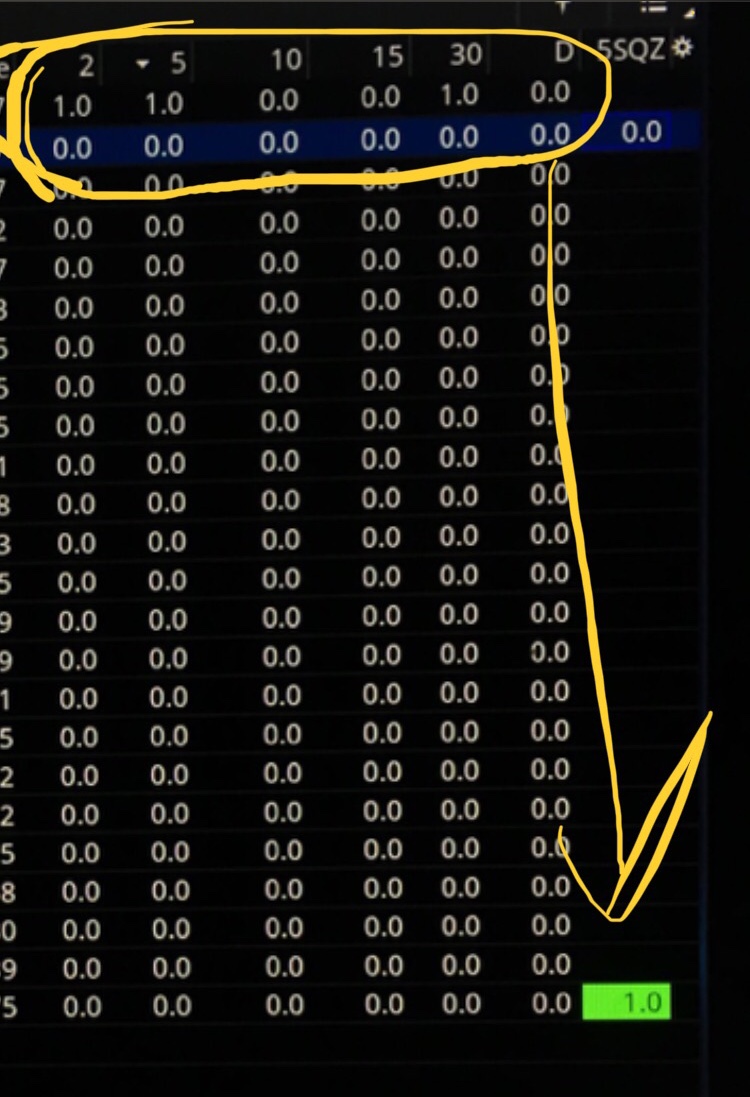
Hello Pete. Welcome back my friend! Glad to see you are recovering so well. I wanted to run something by you. I have a custom study that I use in several custom watchlist columns. It puts the 1 in the column if the conditions of the study are met. Pretty basic. I built this study with the condition wizard and the resulting thinkscript is in a different format than what I see in your videos because you are actually doing the coding and I am relying on the wizard to do mine. When I look at your videos that pertain to changing the background color of custom columns, they all appear to be referencing code that you entered vs. what TOS enters via the wizard. I use your TTM Squeeze study in one of my columns and it turns green when the conditions are met. I love how that makes it easier to identify and not miss opportunities. Is it possible to get the same color changing code on things built with the wizard? Or would the code have to be re-written using actual coding “language” like what you use. I am attaching some photos that show both the condition wizard inputs, the resulting thinkscript and also a snapshot of the custom columns I use. The far right column is the TTM one I described above with the green highlights. Thanks in advance for any guidance you can provide! RESOLVED
Marked as spam
|
|
Private answer
The Condition WizardFor the benefit of the rest of our viewers, let's make sure they know where to view the video I just published showing how to use the Condition Wizard on Thinkorswim: https://www.hahn-tech.com/thinkorswim-condition-wizard/ In that video I go through the basics and show how to use the Condition Wizard to build custom scans, alerts, chart studies and watchlist columns. From that video we learn that after building your code in Condition Wizard, you can jump over to the thinkScript Editor side and copy/paste the code it produces:
That is the code I got after creating the set of conditions shown in your screenshots. Which we actually not screenshots. Those were pictures of your screen, taken with a camera. You can get much better results by using the built in tools available on every computer that actually capture the screen and save it as an image file. Converting the Code to a Variable AssignmentOk so we have the code from your set of conditions. Great. Next step, we learn how to convert that to a variable assignment that can be used to color the background of your watchlist column. By the way, I have already planned this as the topic of my next video. Stay tuned. Here I am creating a variable named "myCondition" and assigning the result of your conditions as it's value:
Notice I began the statement with the keyword "def", followed by the variable name, and then placed an equal sign before pasting the exact same code generated by you through the Condition Wizard. At the very end, I placed a semicolon ';'. Which is very important! Assigning the Background ColorNow we only need to add one more line of code to use the value of that condition to change the color of the background on our watchlist. We'll be using a function named "
In English: Assign background color green IF myCondition variable equals 'yes'. Otherwise, assign background color red. Oh yeah, the compiler will be expecting at least one plot statement. Which we can simply create like this:
You can place that after the line used to assign the background color. That's it, we're all done. Marked as spam
|
Please log in to post questions.


